Summer is the busiest time of year for me at work and this usually starts around spring, so I’m very grateful for everyone’s patience with me posting here. I am happy to report that my one of my dressmaking projects (see previous inspiration post here) is now complete after encountering some difficulties.
Today, I will talk you through some lessons I’ve learned from sewing this project (having been sewing sporadically for 5 years now) and reveal my final design.
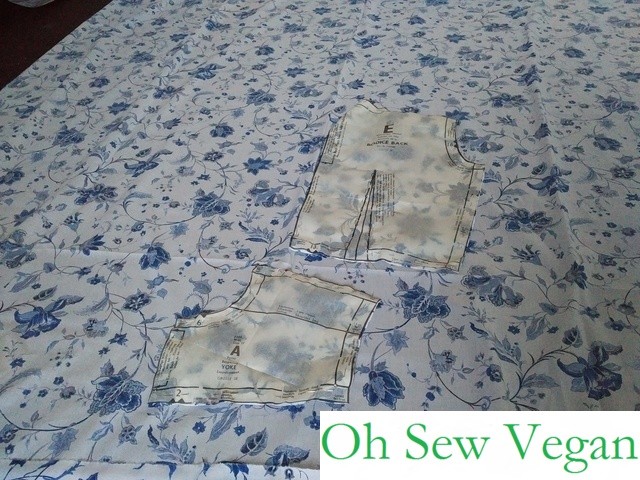
Cutting pattern pieces with my Liberty of London cotton lawn fabric
Note: This blog post was made possible with the support of Tissura who provided the fabric for this project.
It’s all in the detail
When you’re an independent dressmaker/sewer making individual unique sewing projects for yourself, the world is not always your oyster. A lot of the ideas we have in mind to make, based high street or designer styles, are limited by what haberdashery is available to us, either online or in local stores. I mentioned in my previous post (here) that my intention was to use a two-way metal zip for contrast. Two-way zips for coats and jackets at 36″ long are easily found on eBay or Google, but when you’re after something specific (in particular a 12″ or 14″ version), the choices are a bit more limited. I settled for a plastic 18″ one but when it arrived realised it was too big and more suited to neoprene/casual style jackets or coats.
In the end I decided to go with an one-way plastic open zip in white from my local fabric store. The contrast isn’t as clear, but at least it’s a more sedate looking zip. I had played around with the idea of choosing a metal zip with scalloped edges and adding some contrasting black lace for the waistband, but with the floral pattern, I preferred to keep it simple. It has planted another idea in my head with making a similar dress in the future though!
Sewing machine troubleshooting
Sometimes your trusty sewing machine, that is an extension of your sewing creative mind, has bad days too. I’ve only had my machine for about 3 years and it hasn’t had any issues whatsoever…until this sewing project. It took me a while and a few trials and errors to realise when I need to refill my bobbin again with the spool of thread on the top that it seems to cause issues with the tension on the needle. I used Google to search troubleshooting suggestions, tried changing the needle tension from 0 to 9 (although it’s always been on 3 and has worked on cotton and other thin fabrics without any issues) without any success. What finally fixed was completely re-threading my machine a few times to re-set it.
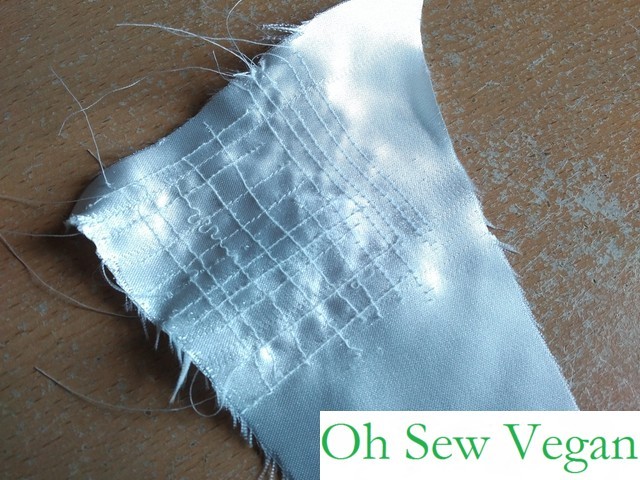
The lines of stitching on scrap fabric every time I’ve tried changing the needle tension and re-threaded the machine
I realise this is probably an issue I’ll need to take to a sewing machine repair shop to address, but in the meantime, I hope re-threading the machine is the easiest fix for issues like this.
Matching lines of stitching
A great tip I discovered for myself in a sewing project I made a few years ago with matching your lines of stitching, so it appears to be a continuous line, was to use a trusty tool no tailor/sewer/dressmaker would be without: dressmaking pins.

Use pins to match lines of stitching for a continuous seam
When making any dressmaking project, the key is to make it look like a professional job. One of the more obvious mistakes to a keen sewer is whether the lines of stitching are even, straight and continuous or match. So for a hobbyist sewer, how do you achieve this?
The simple answer is, before you sew two pieces together, match the seams together on the right sides, pin along this line of stitching before pinning along the second line of stitching you are planning to make next.
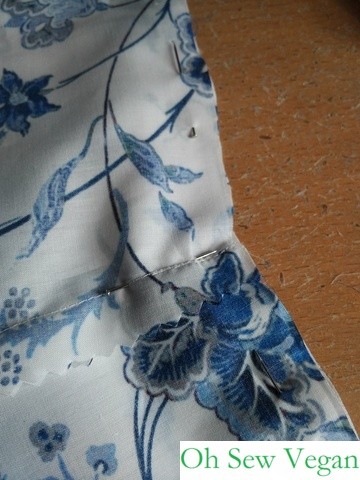
Matching the line of stitching along the waist before sewing the front and back pieces together
A simple trick can make everything look professionally done and look much neater on closer inspection.

The intersection between the side seam and the line of stitching at the waist
Matching the lining to the hem
When I finished any dressmaking projects in the past, taking up the hem was always the last part to give the whole project finality. I never paid too much attention to how the lining fit to the dress, mainly because a) I would attach the lining to the dress around the armholes and the neckline and leave the lining separate from the dress, or b) the fabric was thick enough it didn’t need lined.
I’m starting to try to pay more attention to my finished garments now though and want to give it a more professional and finished look to it than exposed lines of stitching and raw edges. With the dress being open completely from the centre front line, I need to make sure the lining is fully attached to the dress. This means that the lining along the hem will also need to be attached to the hemline of the dress itself.

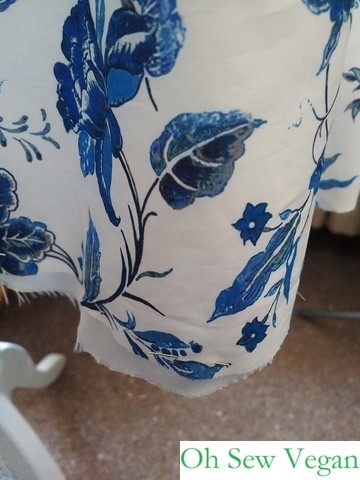
The dress mid-way through completion with raw edges
To make sure the lining fit perfectly into the dress without ‘bubbling’ out on the inside (this happens when you match take up the hem, but you’ve got too much excess fabric from the lining, so it creates a bubble along the hem), I hung the dress on the mannequin with the wrong sides of the dress and lining facing each other (so the lines of stitching are hidden from view) and pinned the lining along the raw hem to the dress to identify where there is excess fabric exposed.
Cutting the same pieces on different fabric at different times can result in some pieces being longer (or shorter) than others
Once I pinned the lining to the dress along the hem, I took my dressmaking shears to the lining and cut off the excess fabric. Leaving the lining pinned to the dress meant I could easily fold up the hem to make sure the hem is straight before I stitched the taken in hem accurately.
The final reveal
In this instance, it was my very first dress with an open centre seam so I had to make sure the lining was fully stitched to the dress along all raw edges before I could stitch the centre zip to the dress itself. Having the mannequin was quite handy to make sure the zip placement was exactly where I wanted it. The zip starts around the bust area and ends at the hip/crotch area. I made sure both sides of the front panels match by finding the midway line of the zip and matching this to the waist-line stitching on both panels before pinning it in place on the mannequin.
The sleeves are held up by panels stitched with remaining mother of pearl buttons I bought years ago that I’m trying to use up. I have floral cloth-covered buttons that would match the style of the Liberty of London fabric, but they’re in fuschia pink and purple, so a more neutral toned button seemed more appropriate for a sedate and elegant look for this project.
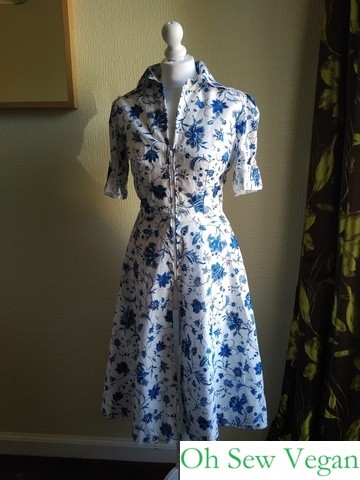
The finished dress


If worn with the original designer style in mind, it’s possible to wear this dress with the zip lowered for a more risqué look and smart boy shorts, but I’m not one for short shorts and intend on wearing this dress with nicer leggings and heels. You can also lower the zip from the top to wear a vest underneath so darker coloured leggings don’t look too harsh with the cooler colour palette of the dress.
I was very pleased at how quickly this project took, although the time in between sessions was much longer because of work. All in all, the whole project took 10.5 hours combined to complete, with the lining, the dress and assembling the two parts together. To give you an idea of timings, the first time I attempted this dress 6 years ago, it took 27 hours to make. On my second attempt, with a bit more sewing experience, I completed the dress in 14 hours – without lining. So practice really does make your experience perfect and makes you consider other things to make your projects better too.
Once again, I would like to thank Tissura for supporting my dressmaking project by supplying me with the beautiful cotton lawn Liberty of London fabric showing in the photos.
What do you think of the finished dress? How would you style this dress if you were wearing it to an event? Let me know your thoughts in the comments section below.
